Golf carts are no longer limited to golf courses. They now serve resorts, campuses, retirement communities, farms, and private estates. Industry analyses from Grand View Research and Mordor Intelligence indicate continued growth in the global golf cart market. More vehicles mean more exposed vinyl seats, especially in humid, dusty, and heavily used environments.
The practical question is simple: How to clean golf cart seat upholstery without causing cracking, discoloration, or sticky residue? Upholstery cleaning specialist Michael Berry describes cleaning as “the removal of unwanted matter.” That principle matters here. Dirt must be lifted carefully, not merely spread across the seat. The IICRC S300 standard also emphasizes identifying the material and testing cleaning solutions before full application. A seat may look like leather, but it is often coated vinyl or marine-grade synthetic fabric.
I learned this the hard way. A strong household degreaser removed grime, but it also left a dull patch near the seat seam. Small damage becomes obvious in sunlight. Start with a vacuum, soft brush, mild soap, and clean water. Use a microfiber cloth around stitching and drainage gaps. Never flood the cushion. Moisture can hide beneath the cover and create odors later.
This guide explains how to clean golf cart seat upholstery with safer, repeatable steps. It also covers stains, mildew-like marks, drying, and routine protection. Results can vary. Old vinyl may not return to its original color, even with careful work. That is an uncomfortable truth. Good maintenance improves appearance and service life, but it cannot reverse every sign of age.
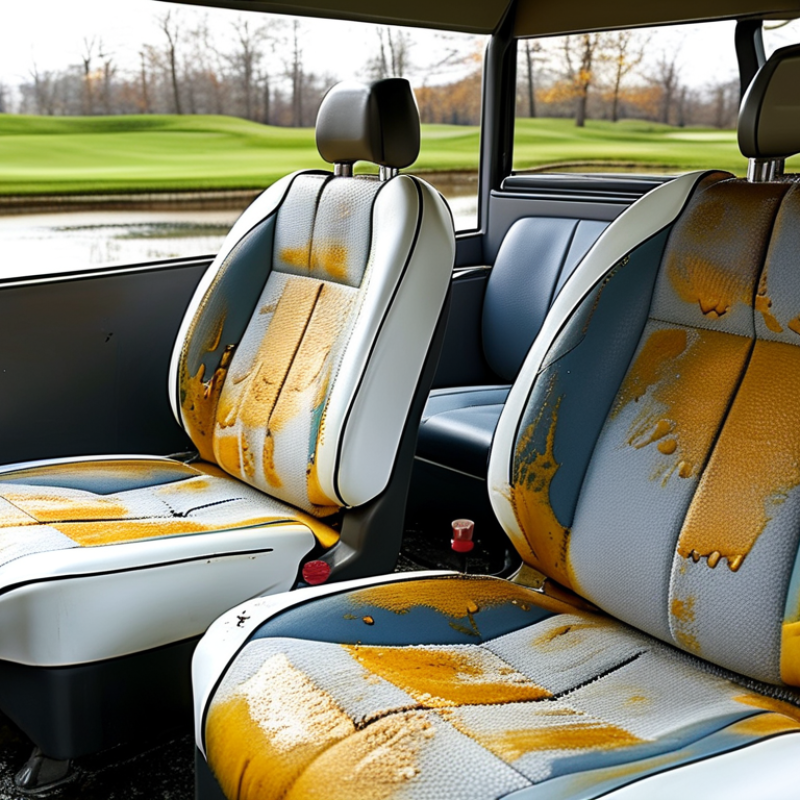
How to Clean Golf Cart Seat Upholstery Easily?
Before cleaning, identify the golf cart seat material. Most seats use vinyl, coated synthetic leather, or outdoor fabric. Vinyl feels smooth and slightly flexible. Coated synthetic leather may show a fine grain and a softer backing. Fabric feels woven and absorbs a drop of water quickly. Real leather is less common and needs specialized care. Do not guess. Check the seat label or maintenance guide when available.
The material determines the cleaning method. For vinyl, use warm water, mild soap, and a soft cloth. Avoid stiff brushes, bleach, and strong solvents. They can remove protective coatings or cause cracking. Fabric usually needs gentle vacuuming before spot cleaning. Test diluted cleaner under the seat first. I once cleaned a pale seat too aggressively, leaving a dull patch. That mistake was avoidable. Pat stains instead of rubbing them deeper.
Tips: Inspect seams and damaged areas before adding moisture. Keep water away from switches and wiring. Use a damp cloth, not a soaked one. Dry the upholstery in shade with good airflow. Direct heat may harden synthetic materials. If the surface remains sticky after cleaning, stop and reassess the product. A cleaner that works on fabric may damage vinyl. Record what you used, especially after an unsuccessful test.
| Seat Upholstery Material | How to Identify It | Recommended Cleaning Solution | Cleaning Method | Drying Requirement | Important Precautions |
|---|---|---|---|---|---|
| Marine-Grade Vinyl | Smooth, slightly flexible surface with a consistent grain pattern; commonly used on outdoor seats. | Warm water mixed with a small amount of mild, pH-neutral dish soap. | Remove loose dirt with a soft brush or vacuum. Wipe with a microfiber cloth, gently scrub seams with a soft toothbrush, and rinse with a clean damp cloth. | Dry immediately with a towel, then leave the seat in a shaded, well-ventilated area until completely dry. | Avoid bleach, abrasive pads, strong solvents, and prolonged direct sunlight while wet. |
| PVC-Coated Fabric | Fabric-like texture with a coated or lightly rubberized surface; may feel less smooth than vinyl. | Cool or warm water with a mild detergent diluted according to the detergent label. | Vacuum first. Blot spills rather than rubbing them deeply, then clean small sections with a soft cloth and light circular motions. | Use minimal water and allow both the surface and seams to air-dry fully before covering the cart. | Do not soak the cushion, use a stiff brush, or apply high heat, as moisture can remain inside the padding. |
| Synthetic Leather | Smooth leather-like finish with a uniform surface and no natural pores or irregular grain. | A small amount of mild soap in water; use a cleaner specifically labeled as safe for synthetic leather when needed. | Dust with a dry microfiber cloth, wipe gently with a damp cloth, and remove soap residue with a second clean cloth. | Pat dry and let the upholstery air-dry away from heaters and strong sunlight. | Avoid alcohol-based cleaners, acetone, petroleum solvents, and excessive scrubbing that may damage the coating. |
| Woven Polyester or Nylon Fabric | Visible woven fibers, a more textured feel, and liquid that may soak into the material instead of forming droplets. | Warm water and a small quantity of mild laundry detergent or upholstery cleaner labeled for synthetic fabric. | Vacuum thoroughly, pre-treat stains, blot with a damp cloth, and use a soft brush only on persistent marks. | Press with dry towels to remove moisture and ventilate the seat until the fabric and foam are fully dry. | Test the cleaner on a hidden area first; avoid over-wetting, which can cause odor or mildew inside the cushion. |
| Canvas or Heavy-Duty Outdoor Fabric | Tightly woven, durable fabric with a matte appearance and a noticeably heavier feel. | Water with a mild soap solution; use a fabric-safe stain remover for localized stains. | Brush away dry debris, blot spills, clean from the outside toward the center of a stain, and rinse lightly. | Dry in moving air and turn or prop up the cushion so moisture can escape from all sides. | Do not use excessive pressure or a pressure washer, which can force water into seams and padding. |
| Natural Leather | Natural grain variation, softer feel, and small pores or marks that are not perfectly uniform. | A leather cleaner with a neutral formulation, followed by a suitable leather conditioner. | Remove dust, apply cleaner to a cloth rather than directly to the seat, wipe gently, and buff with a dry cloth. | Allow the surface to dry naturally before applying conditioner sparingly. | Avoid household detergents, soaking, direct heat, and untested oils that may darken or weaken the leather. |
| Perforated or Quilted Upholstery | Small ventilation holes, stitched sections, or quilted panels are visible across the seat surface. | A lightly diluted mild soap solution or a material-specific upholstery cleaner. | Use a soft microfiber cloth and a soft-bristled brush around stitching; clean in small areas and remove residue promptly. | Towel-dry carefully and provide strong airflow to prevent moisture from collecting in holes and seams. | Never flood or pressure-wash the surface; water may pass through perforations into the foam. |
: Use nitrile gloves, safety glasses, a soft vacuum attachment, microfiber towels, and a soft-bristle brush. Keep clean water separate. Choose a pH-neutral upholstery cleaner suitable for the seat material.
Park the cart on a shaded, level surface. Open doors or windows for better ventilation. Remove mats and loose items before cleaning. Cover nearby electrical controls with a dry towel.
Grit often hides around seams, piping, and seat edges. Vacuum slowly to avoid pressing sand deeper into the upholstery. A dry microfiber cloth can remove fine dust from smooth surfaces. Rubbing too hard may create dull patches.
Look for cracked vinyl, exposed foam, loose stitching, or color transfer. Test the cleaner on a hidden area. Wait several minutes before judging the result. I once skipped that wait. The color changed later.
Use less moisture than expected. A damp cloth is safer than a soaked cushion. Apply cleaner to the cloth, not directly onto seams or openings. Work in short sections and rinse the cloth often.
Remove dry dirt before treating visible marks. Use diluted cleaner and a fresh cloth. Treat stains gently, especially on cracked upholstery. A faint ring may need two careful treatments. More pressure is not always better.
Park the cart in a shaded, well-ventilated place. Press an absorbent towel along seams and folded edges. A fan can help from several feet away. Allow the seats to dry completely before inspection. Do not rush this part.
Apply conditioner only after the upholstery is fully dry. Test it on a hidden area first. Spread a thin layer with a soft cloth. Remove excess product to prevent slipperiness and dust buildup. Too much shine proves little.
Learning how to clean golf cart seat upholstery begins with identifying the seat material, such as vinyl, fabric, or another surface, because each type requires a different level of care. Before cleaning, gather mild soap, clean water, soft cloths, a soft brush, and suitable protective items. Move the cart to a shaded, well-ventilated area and protect nearby surfaces from moisture. Remove loose dirt, dust, sand, and debris with a vacuum or dry brush so they do not spread during washing.
Apply a gentle cleaning method suited to the upholstery. Use a lightly dampened cloth for regular maintenance, and work carefully on stained areas with a soft brush rather than harsh scrubbing. Avoid excessive water, strong chemicals, and rough tools that may damage the surface. After cleaning, wipe away residue, allow the seats to dry completely, and apply a compatible conditioner when appropriate. Finally, inspect the upholstery for remaining stains, odors, or moisture, and repeat the process gently if necessary.

 Tulip Cart