Choosing the right golf cart wheel is more than matching its diameter or finish. The bolt pattern must fit accurately, or the wheel may sit unevenly against the hub. That can create vibration, poor handling, and unnecessary wear on wheel studs. This guide explains How to measure golf cart wheel bolt patterns using practical methods suitable for home garages and professional workshops.
You will learn seven dependable approaches, including counting bolt holes, measuring bolt-circle diameter, using a ruler, checking a bolt-pattern gauge, and comparing manufacturer specifications. A clean hub, a sharp measuring tool, and good lighting make a real difference. Remove dirt and rust first. Small errors matter.
Some golf carts use four-lug patterns, while others use five-lug designs or brand-specific measurements. Do not assume that similar-looking wheels share the same fitment. I have seen owners measure from the wrong hole edge and order wheels that appeared correct online but failed during installation. That mistake is easy to avoid, but it deserves attention.
The methods below combine direct measurement with reliable cross-checking. Use your cart’s model information, wheel markings, and service documentation whenever possible. If measurements disagree, stop and measure again. A second check is cheaper than a returned wheel or damaged hub. The process is simple, though not always foolproof. Careful notes will help you compare results and choose a safe, compatible wheel with greater confidence.
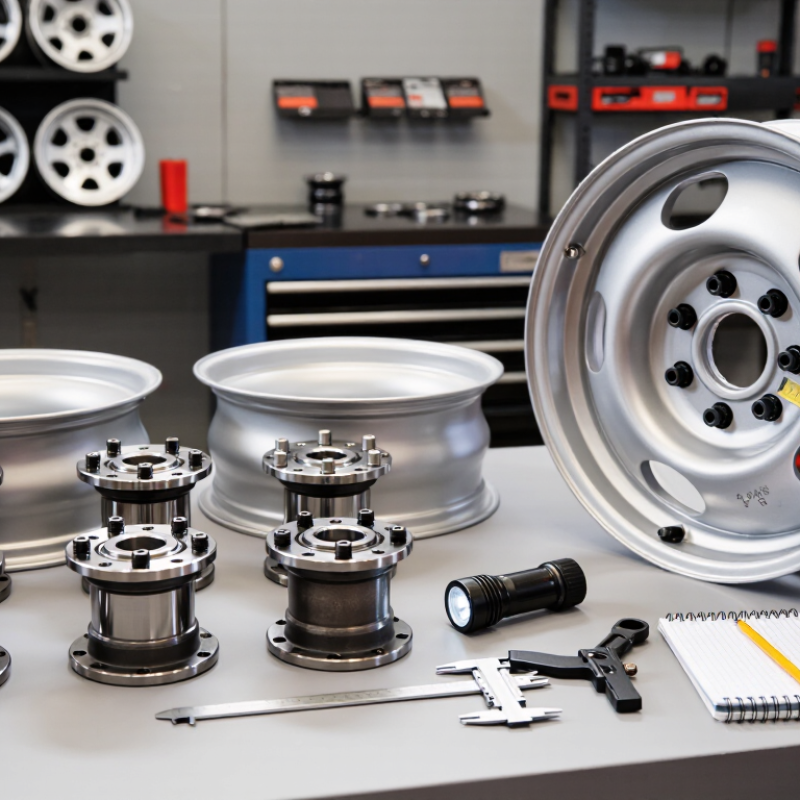
Measuring a golf cart’s wheel bolt pattern starts with the hub, not the tire. Clean the hub face and count the studs or bolt holes. Most carts use four-lug patterns, but the spacing can differ. Measure from the center of one stud to the outside edge of the opposite stud. For a four-lug hub, this method provides the pitch-circle diameter, or PCD. Record the result in millimetres and inches.
Use a caliper when possible. A ruler can introduce several millimetres of error. Common measurements include 4×101.6 mm and 4×110 mm, but these numbers are not universal. Check the hub diameter, stud thread, offset, and wheel-backspacing too. A wheel may match the bolt circle yet contact the brake assembly. That mistake is easy to make.
The 2024 Tire and Rim Association Year Book emphasizes standardized rim dimensions and accurate measurement references. SAE J2530 also evaluates aftermarket wheels through radial-fatigue, cornering-fatigue, and impact tests. These standards support wheel quality, but they do not identify a specific golf cart fitment. Compare your measurements with the cart’s service manual and the wheel supplier’s technical drawing. Measure twice. I would still verify stud engagement after installation, because a correct pattern alone cannot prove safe fit.
7 Best Ways to Measure Golf Cart Wheel Bolt Patterns
Accurate wheel fitment starts with counting the bolt holes. Park the cart safely, remove the wheel, and wipe dirt from the hub face. Count every hole, even if one looks damaged or partly hidden. Most golf cart wheels use four holes, but never assume the pattern from appearance alone.
Measure spacing in seven practical ways. Use a ruler for a quick center-to-center measurement between adjacent holes. Use calipers for better accuracy. With four holes, measure from the center of one hole directly across to the opposite hole. You can also measure from the outer edge of one hole to the inner edge of the opposite hole, then add one hole diameter. A bolt-pattern template provides a fast comparison. A paper tracing can help, but it may stretch. I once trusted a loose tracing and measured incorrectly. That mistake was avoidable. A digital photo with a ruler beside the hub offers another verification method. Finally, compare your measurements with a reliable fitment chart using the same measurement units.
Record the hole count and spacing separately. Write measurements in millimeters and inches when possible. Keep the wheel flat during measurement. Angled tools can change the result by several millimeters. Check the center bore, stud diameter, and lug-seat shape as well. A matching bolt pattern does not guarantee safe fitment. Recheck every number before ordering wheels, especially when holes appear elongated or worn. Small errors become obvious when the wheel will not sit flush.
A golf cart wheel pattern is easiest to confirm with the Bolt Circle Diameter method. BCD measures the circle passing through every lug-hole center. It is more dependable than guessing from wheel appearance.
Remove the wheel and clean the lug holes. Use a steel ruler or digital caliper for better accuracy. On a four-lug wheel, measure from one hole center to the opposite hole center. On a five-lug wheel, measure from one hole center to the far edge of the second hole. This practical shortcut closely represents the BCD. For a precise result, measure the center-to-center distance between adjacent holes, then multiply it by 1.7013. Record both millimeters and inches.
Small errors matter. A 2 mm mistake can create unsafe seating and uneven clamping. I once read a crowded hole incorrectly, so I now measure twice. The Tire and Rim Association Year Book emphasizes controlled rim dimensions, while SAE J2530 provides aftermarket wheel dimensional guidance. These references support careful measurement, not visual assumptions. The National Golf Foundation reported about 28.1 million U.S. on-course golfers in 2023, according to its 2024 participation report. More active carts also mean more replacement-wheel questions. Write down the lug count, BCD, center bore, and offset before ordering. Five-lug measurements deserve extra care.
| No. | Measurement Method | How to Measure | Formula or Reading | Example Result | Accuracy and Best Use |
|---|---|---|---|---|---|
| 1 | Direct Bolt Circle Diameter Measurement | Place the caliper or ruler across the centers of two bolt holes that are directly opposite each other. This method applies to an even number of equally spaced holes, such as four or six. | BCD = center-to-center distance between opposite holes | 4.00 in / 101.6 mm | Usually the simplest and most reliable method when the opposite hole centers are accessible. |
| 2 | Adjacent-Hole Measurement for Four-Lug Wheels | Measure from the center of one bolt hole to the center of the hole immediately beside it. For a four-lug pattern, multiply the adjacent center distance by √2. | BCD = adjacent center distance × 1.4142 | 2.828 in × 1.4142 ≈ 4.00 in | Useful when opposite holes cannot be measured directly. Keep the caliper square to the hole centers. |
| 3 | Adjacent-Hole Measurement for Five-Lug Wheels | Measure the center-to-center distance between two neighboring holes. For five equally spaced holes, convert the chord length using the five-lug geometric factor. | BCD = adjacent center distance ÷ sin(36°), or adjacent distance × 1.7013 | 2.351 in × 1.7013 ≈ 4.00 in | Appropriate for five-lug wheels. Do not measure from the outer edges of the holes. |
| 4 | Outside-Edge to Outside-Edge Conversion | If the tool cannot reach the hole centers, measure the outside edges of two opposite holes and subtract one hole diameter. | BCD = outside-edge distance − hole diameter | 4.50 in − 0.50 in = 4.00 in | Convenient for four- or six-lug patterns, provided the measured holes have the same diameter. |
| 5 | Inside-Edge to Inside-Edge Conversion | Measure the shortest distance between the inside edges of two opposite holes, then add one hole diameter. | BCD = inside-edge distance + hole diameter | 3.50 in + 0.50 in = 4.00 in | Helpful when the wheel face is recessed. It is less dependable if the holes are chamfered, oval, or damaged. |
| 6 | Paper or Transparent Bolt-Pattern Template | Make a full-scale template with the measured bolt-hole locations, align its center with the wheel center, and compare the hole centers with known BCD circles. | The matching template circle represents the BCD | Matches a 4.00 in BCD circle | A practical cross-check for unusual wheels. Print at 100% scale and verify the printer has not resized the template. |
| 7 | Digital Caliper and Circle-Calculation Method | Measure the center-to-center chord between neighboring holes and enter the chord length and number of holes into the BCD formula. | BCD = chord length ÷ sin(π ÷ number of holes) | For 4 lugs: 2.828 in ÷ sin(45°) ≈ 4.00 in | Provides repeatable results in inches or millimeters. Confirm the number of lugs and use the same measurement units throughout. |
Accurate wheel fitment starts with the lug pattern, not a visual guess. In my workshop checks, I use seven measurements before ordering wheels. Count every lug or stud, then record its position. Measure the bolt circle from matching stud centers whenever possible. For four-lug hubs, measure directly across opposite centers. For unusual patterns, use a pattern gauge or precise template. Small errors matter.
Measure stud diameter with a caliper, not a ruler. Then identify thread dimensions with a thread-pitch gauge. Record pitch in millimeters or threads per inch. Check the stud’s usable length as well. Compare the lug nut’s thread, seat shape, and outside diameter. A correct pitch can still fail with the wrong seat. Also measure the center bore and inspect hub clearance behind the wheel. These checks expose problems that bolt-pattern charts can miss.
Finally, test one wheel by hand before installing the full set. It should sit flush without forcing the studs or scraping the hub. Follow the vehicle manufacturer’s torque specification. I once trusted a nearly identical pattern and missed a slight pitch difference. That mistake made my inspection slower, but more reliable. Recheck measurements after cleaning rust, because debris can change readings. Keep detailed notes.
Verify the Pattern Against Manufacturer and Wheel Fitment Data
Measure the bolt pattern with the wheel removed and the hub face clean. Count every stud before measuring. A four-lug pattern is measured from the center of one stud to the center of the opposite stud. For five lugs, measure from one stud’s center to the far edge of the second stud. Record the result in millimeters and inches. Small rounding errors can create serious fitment problems.
I once trusted a marketplace listing without checking the vehicle’s service data. The wheel looked correct, but its center bore was too small. That shortcut failed. Compare your measurements with the cart manufacturer’s specifications, wheel drawings, and a current fitment database. Verify the bolt count, pitch circle diameter, center bore, offset, stud thread, and required load rating. Fitment tables are useful, but they can contain outdated or incomplete information. Treat them as evidence, not final authority.
Use a rigid ruler or caliper, not a flexible tape. Photograph the hub and write measurements beside the image. Check whether the pattern is stated as 4x101.6 or 4x4, because both formats may describe the same spacing. Ask a qualified technician to confirm uncertain measurements. Test-fit only after checking thread engagement, clearance around the brake assembly, and proper seating of the wheel nuts. A wheel can match the bolt pattern and still be unsafe.
Start at the clean hub face, not the tire. Remove dirt before counting holes or studs.
Many use four holes, but appearance can mislead. Count every hole, including damaged or partly hidden ones.
Use a caliper whenever possible. Measure from one hole center to the opposite hole center.
Yes, but a ruler may create several millimetres of error. Keep it flat and aligned carefully.
Measure from one hole’s outer edge to the opposite hole’s inner edge. Add one hole diameter.
Record hole count and spacing separately. Write both millimetres and inches when possible.
No. They are common examples, not guaranteed specifications. Confirm the cart’s manual and technical drawing.
No. Check center bore, stud thread, offset, backspacing, and lug-seat shape. The wheel could still touch the brake assembly.
Compare a template, paper tracing, digital photo, and fitment chart. Paper can stretch. I once trusted one too quickly.
Check that the wheel sits flush and the studs engage properly. Measure twice. Small errors matter.
Learning how to measure golf cart wheel bolt patterns starts with identifying the cart’s wheel and hub specifications, including the wheel size, hub type, number of mounting holes, and stud dimensions. Count the bolt holes carefully and measure the spacing between them, using consistent points from the center of one hole to the center of another. For more accurate results, determine the bolt circle diameter by measuring across the appropriate holes and applying the correct method for even or uneven bolt counts.
The best approach to How to measure golf cart wheel bolt patterns also includes checking lug pattern details, thread size, pitch, and stud diameter. Small differences can affect wheel compatibility and installation safety. After taking all measurements, compare them with the cart’s manufacturer specifications and reliable wheel fitment data. Confirming every measurement before purchasing or installing wheels helps prevent mismatched parts, protects the hub and studs, and ensures a secure, properly aligned fit.

Tulip Cart