How to store a golf cart for the off-season begins with understanding what winter does to its batteries, tires, and exposed connections. A clean cart in a dry garage may still lose charge while it sits. Battery University’s technical guidance estimates that lead-acid batteries can self-discharge by about 5% per month at 20°C (68°F). The rate varies with battery condition and temperature, so treat that figure as a warning, not a calendar.
Battery expert Isidor Buchmann describes lead-acid batteries as “the most forgiving of all battery types.” Forgiving does not mean maintenance-free. Trojan Battery’s deep-cycle battery guidance recommends charging batteries before storage and checking them periodically; the right routine depends on whether your cart uses flooded, AGM, or lithium batteries. Check your owner’s manual before disconnecting cables or connecting a maintainer.
A small leak can matter. So can a damp floor, a tire losing pressure, or a charger left plugged into an unsuitable outlet. Wash away mud, dry the bodywork, and inspect the battery area for corrosion before the first frost. Then choose a storage spot with a stable temperature and good ventilation. Not glamorous work. Still worth doing.
This guide explains how to prepare the cart, care for its battery, protect its tires, and bring it back into service. One caution deserves emphasis: storage advice is not universal, and guessing can be costly. Use the cart and battery manufacturers’ instructions when they differ from general guidance.
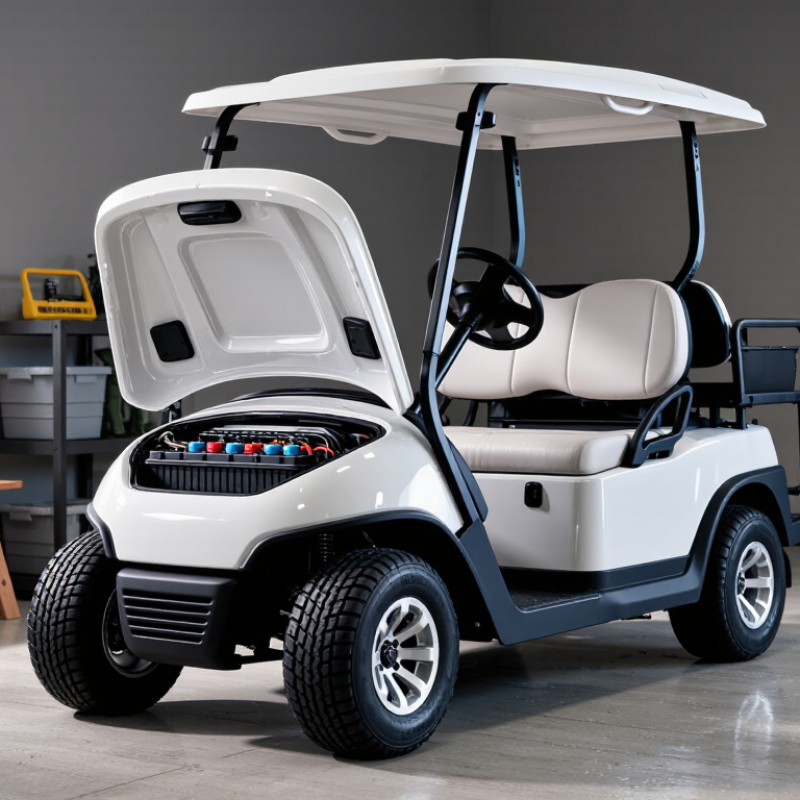
Before choosing a storage spot, inspect the cart while it is clean and dry. Look for cracked tires, loose wiring, corrosion, and damp areas under the seats. Note any fuel or fluid smells; investigate them before putting the cart away. Small problems can become harder to spot after months in storage.
Check the battery type and the owner’s manual for storage instructions. Battery care differs, so avoid guessing about charging or disconnecting it. Take a quick photo of the connections before moving any cables. It may save confusion later.
Choose a level, dry location with room to walk around the cart. A garage or covered shed can limit rain and sun exposure, but only if the space stays ventilated and does not trap moisture. Keep the cart away from roof drips, sprinklers, and standing water. Check that the floor can support its weight, especially in older sheds. No tight corners. Leave enough space to inspect the tires and reach the charging area without stretching cords across a walkway. If the only option is outdoors, use a well-fitted cover designed for the cart, and make sure air can circulate beneath it. Covers can still trap dampness. I have found that checking the spot after a rainy day reveals problems a quick first look misses.
Before storing a golf cart, remove loose gear and sweep leaves, sand, and grit from the floor and storage pockets. Wash the body with mild soap and water, using a soft cloth around seams and trim. Keep water away from electrical connections, and avoid forceful spray near switches or the motor area. Clean the seats, too; trapped dirt can leave marks over time. Let everything dry fully. Damp corners are easy to miss.
Now inspect the cart in good light. Look closely. Check the tires for cracks, uneven wear, and objects lodged in the tread. Note any cuts or bulges, and check tire pressure against the guidance in the cart’s manual. Examine the windshield, roof supports, seat hinges, and exposed fasteners for looseness or damage. Test the lights and horn if fitted. I used to rush this part; small problems are harder to spot once the cart is covered.
Check the battery area for corrosion, damaged cables, or loose connections, but don’t handle components you’re unsure about. Follow the manual’s cleaning and storage instructions, since battery types and cart designs differ. Wipe away any visible residue only as directed. A short written list of worn parts can help you arrange repairs before the next ride. It’s not foolproof, but it’s useful.
Before storage, clean the battery tops and check for loose or corroded connections. For flooded lead-acid batteries, check water levels and follow the manual’s charging instructions. Use distilled water only if needed. Lithium batteries have different storage requirements, so check their recommended charge level. A battery disconnect can help reduce drain, but use the cart’s instructions before disconnecting anything.
For a gas-powered cart, add fuel stabilizer only as directed, then run the engine outdoors according to the manual. Never run it in an enclosed garage. Electric carts do not need fuel treatment, but their battery still needs suitable charge and storage conditions. Park on a dry, level surface, set the parking brake, and check tire pressure. Small details matter. I’d recheck the battery after a few weeks; storage plans are easy to forget.
Tips: Keep the cart covered but allow ventilation to limit trapped moisture. Note the storage date and battery condition on a simple tag. If the manual’s guidance conflicts with general advice, follow the manual—it may feel overly cautious, but battery types and cart designs vary.
Before storing the cart, wash the tires and remove grit from the tread. Dry the sidewalls, then check cold pressure against the cart’s manual. The U.S. Tire Manufacturers Association notes that tire pressure can drop about 1 psi for every 10°F decrease in temperature. Check it monthly during storage. Don’t inflate beyond the recommended pressure. If practical, roll the cart a short distance occasionally to change the tire contact points. Small details matter.
Rinse dust and road residue from the body, then dry seams and exposed metal to limit lingering moisture. Store the cart out of direct sun, ideally in a cool, dry space. USTMA’s tire-care guidance also recommends keeping tires away from sunlight and ozone sources. A breathable cover can help keep off dust. A very tight cover may feel safer, but trapped damp air is a tradeoff.
Clean the seats and floor, and remove food, wrappers, and damp cloths before closing up. Keep the interior dry; EPA guidance recommends indoor relative humidity below 60%, ideally between 30% and 50%, to discourage mold growth. A small humidity meter makes checks easier. Leave enough ventilation to prevent stale, damp air, while keeping rain and pests out. The awkward corner behind the seat is easy to forget.
How to Store a Golf Cart for the Off Season
Before storage, park the golf cart on firm, level ground, away from standing water and falling branches. Choose a dry, ventilated space where you can reach the cart without moving heavy items. Set the parking brake, switch off the power, and secure the wheels with chocks if the floor slopes slightly. Remove the key and store it separately. Small details matter.
Plan a brief inspection every few weeks, and put the dates on a calendar rather than relying on memory. Look for damp spots beneath the cart, new tire bulges, loose covers, and signs of pests near wiring. Check that the storage area remains dry and that nothing has shifted against the cart. If the weather turns unusually cold or wet, inspect it sooner. A quick look is useful, but it does not replace the checks recommended in the owner’s manual.
During each visit, follow the manual’s instructions for the battery type and charging system; storage needs can differ. Avoid guessing at charge settings. Note the tire pressure and battery condition, so gradual changes are easier to spot. It is tempting to skip a check when everything looked fine last time. That assumption can be costly: a small leak or flat tire may worsen quietly over several weeks.
Suggested intervals for securing the cart and checking key storage conditions. Follow your cart and battery manufacturer’s instructions for model-specific requirements.
Check for cracked tires, loose wiring, corrosion, and damp spots under the seats. Investigate fuel or fluid smells before storage. Small problems can hide later.
Check the owner’s manual and identify the battery type. Storage instructions vary, so don’t guess about charging or disconnecting it. Photograph the connections before moving cables.
Choose a level, dry place with room to walk around the cart. A garage or covered shed can help, if it stays ventilated and does not trap moisture. No tight corners.
If necessary, use a well-fitted, breathable cover made for the cart. Keep air moving beneath it, and check for dampness after rain. Covers can still trap moisture.
Clean the tread, dry the sidewalls, and check cold pressure against the manual. Pressure can drop about 1 psi when temperatures fall 10°F. Check monthly.
If practical, roll it a short distance occasionally to change where the tires touch the floor. I still forget this sometimes.
Rinse away dust and road residue, then dry seams and exposed metal. Remove food, wrappers, and damp cloths. The corner behind the seat is easy to miss.
Keep indoor relative humidity below 60%; 30% to 50% is a useful target. A small humidity meter helps. Keep the area ventilated, but block rain and pests.
How to store a golf cart for the off-season begins with assessing its condition and choosing a dry, sheltered, well-ventilated location. Before putting it away, give the cart a thorough cleaning and inspect it for damage, worn parts, or other issues that may need attention. Taking care of these tasks now can help prevent small problems from becoming harder to address later.
Prepare the battery, fuel system, and other key components according to the cart’s requirements, and protect the tires from prolonged pressure in one spot. Cover the exterior while keeping the interior clean and dry. Finally, secure the cart and make a simple schedule for periodic checks during storage. A little preparation and occasional attention can help keep the cart in better condition and make it easier to return to use when the season changes.

Tulip Cart