Golf cart lights often fail for a simple reason: the cart’s battery voltage exceeds the lights’ rated voltage. A voltage reducer converts that higher supply into a stable output for headlights, taillights, and accent lamps. Without it, bulbs may burn brightly for a short time, while LED drivers can overheat inside their sealed housings. The problem is easy to overlook.
This guide explains How to wire golf cart lights to a voltage reducer with practical, safety-focused advice. It considers battery type, reducer capacity, wire gauge, grounding, fuse placement, and switch control. A multimeter can confirm the battery and output readings before any connection is made. Check polarity twice. One reversed connection may damage sensitive LEDs. A properly sized fuse should sit near the power source, protecting the wiring from accidental shorts. Use insulated terminals and secure cables away from hot parts, steering joints, and moving suspension components.
Real installations are rarely perfect. A reducer may seem powerful enough until several lamps start together. A wire may also look thick but contain poor-quality conductors. These details matter. Manufacturer specifications remain the most reliable reference, especially when mixing accessories from different brands. Take clear voltage readings, label each wire, and test one circuit at a time. Slow work helps prevent expensive mistakes. Still, even experienced installers should recheck their assumptions before powering the system. Reliable lighting depends on more than brightness; it depends on controlled voltage, protected wiring, and careful inspection.
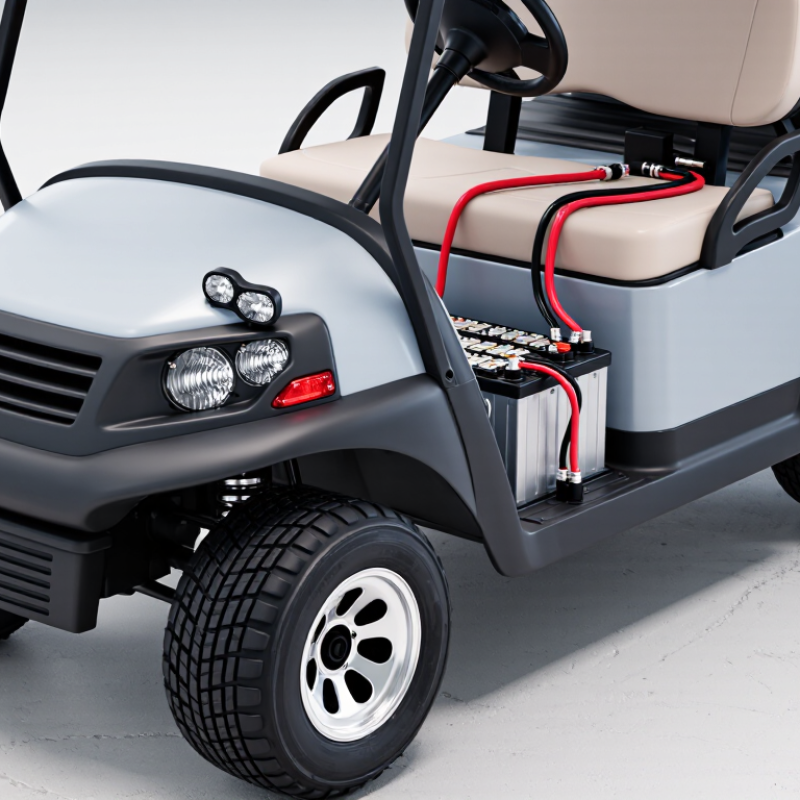
A 36 V or 48 V golf cart battery pack cannot safely power ordinary 12 V lights directly. The voltage gap is substantial. Connecting them without reduction can overheat wiring, damage bulbs, or shorten LED life. A voltage reducer converts the pack’s higher voltage into a stable 12 V supply. It also helps lights maintain consistent brightness as battery voltage changes. In practical installations, correct voltage matters more than simply choosing a brighter lamp.
Tips: Confirm the battery pack voltage with a multimeter before wiring. Check the reducer’s input range and 12 V output rating. Select enough capacity for every light operating together. Add a suitable fuse close to the power source. Keep connections tight, protected, and away from sharp metal edges.
Polarity deserves attention. Connect positive and negative terminals exactly as marked. A wiring mistake may appear harmless, but it can destroy electronic lights quickly. I have seen installers assume every reducer works with both 36 V and 48 V systems. That assumption is risky. Some units accept only one input range. Leave room for inspection, too. A neat installation is easier to test and repair, though perfect routing is not always realistic in a crowded cart. Lights should operate reliably, not merely turn on.
Why Wire Golf Cart Lights to a Voltage Reducer?
Golf carts often use 36- or 48-volt battery systems, while many lights require 12 volts. A voltage reducer protects those lights from excessive voltage and unstable supply conditions. The key sizing step is converting load ratings with P = V × I. For example, four 12-volt lamps rated at 18 watts each draw 72 watts. At 12 volts, the current is 6 amps. A reducer should therefore support more than 6 amps continuously.
Allowing headroom matters. A practical design may select a reducer rated for at least 8 amps, or roughly 96 watts, after allowing for startup surges and wiring losses. The U.S. Department of Energy’s Transportation Energy Data Book notes that auxiliary electrical loads vary with operating conditions, not just vehicle speed. That principle applies here. Night driving, cooling fans, and extra indicators can raise demand.
My first sizing estimate was too neat. I ignored future accessories and measured only the lamps. That can create nuisance shutdowns. Electrical Safety Foundation guidance also emphasizes overcurrent protection and properly sized conductors in low-voltage systems. Use a fused input, secure terminals, and short cable runs where possible. A 2024 technical review from the National Renewable Energy Laboratory reports that temperature and battery voltage affect electrical performance. Therefore, test the reducer under real load, not only with a meter on the workbench. Small measurement errors become visible when the lights flicker.
| Accessory Load | Quantity | Rating per Unit | Total Load | Typical Use | 12 V Output Current I = P ÷ V |
48 V Battery Current I = P ÷ (V × η) |
|---|---|---|---|---|---|---|
| Headlamps | 2 | 35 W | 70 W | Continuous | 5.83 A | 1.62 A |
| Tail lamps | 2 | 5 W | 10 W | Continuous | 0.83 A | 0.23 A |
| Brake lamps | 2 | 5 W | 10 W | Intermittent | 0.83 A | 0.23 A |
| Turn indicators | 4 | 5 W | 20 W | Intermittent | 1.67 A | 0.46 A |
| Electric horn | 1 | 30 W | 30 W | Intermittent | 2.50 A | 0.69 A |
| Radio or control accessory | 1 | 24 W | 24 W | Continuous | 2.00 A | 0.56 A |
| USB charging outlets | 1 | 10 W | 10 W | Continuous | 0.83 A | 0.23 A |
| Maximum connected load | 174 W | All listed loads | 14.50 A | 4.03 A | ||
| Estimated continuous load | 114 W | Headlamps, tail lamps, radio, USB | 9.50 A | 2.64 A | ||
| Reducer Sizing Item | Calculation | Result | Selection Meaning |
|---|---|---|---|
| Required 12 V output current without reserve | 174 W ÷ 12 V | 14.50 A | Minimum calculated output for the listed peak load |
| Recommended output rating with 25% reserve | 14.50 A × 1.25 | 18.13 A | Select a standard reducer rated at least 20 A continuous at 12 V |
| Approximate reducer input current at peak load | 174 W ÷ (48 V × 0.90) | 4.03 A | Size the high-voltage-side fuse and wiring above the calculated operating current |
| Recommended reducer power capacity with reserve | 174 W × 1.25 | 217.5 W | Choose a reducer rated for at least 220 W continuous output |
Why Wire Golf Cart Lights to a Voltage Reducer?
Golf cart batteries commonly deliver 36 or 48 volts, while many lighting systems require 12 volts. Connecting those lights directly can cause overheating, early failure, or melted wiring. A voltage reducer provides a controlled output and protects the lighting circuit from battery fluctuations.
Choose a reducer with an input rating higher than the battery’s maximum voltage. A 48-volt cart may exceed 48 volts while charging, so a reducer rated only at 48 volts may have little safety margin. Its output must match the lights, usually 12 volts. Check every lamp, horn, and accessory connected to the same circuit.
Calculate the load before installation. Add the wattage of all lights, then divide by the output voltage to estimate current. For example, 60 watts at 12 volts requires about 5 amps. Select a reducer rated above that figure, preferably with 25 to 30 percent continuous capacity in reserve. Heat builds quickly inside a cramped compartment. Leave ventilation space, use suitable wire, and protect the input with a correctly sized fuse. A reducer can be powerful enough on paper yet still fail when airflow is poor. That detail is easy to miss. Test the output voltage under load, not only with the lights switched off. Real readings sometimes differ from calculations.
Golf cart lights often need 12 volts, while the battery system may provide much more. A voltage reducer protects bulbs, switches, and wiring from excessive voltage. In my workshop experience, lights last longer when the reducer is sized for the circuit’s total load. Check the light rating and reducer output before connecting anything. Small mistakes here can create heat.
Install the main fuse as close to the battery positive terminal as possible. This placement limits the length of unprotected wire. Choose a fuse rated slightly above the normal operating current, not far above it. A fuse that is too large may allow damaged wiring to overheat. Secure the fuse holder away from water, sharp edges, and moving parts. I once found a loose holder causing intermittent lights; it looked like a switch problem.
Tips: Use correctly sized stranded wire and crimp terminals firmly. Connect every 12-volt circuit ground to a clean metal grounding point or the reducer’s approved negative terminal. Remove paint and corrosion before tightening the connection. Add heat-shrink protection where practical. Test the circuit with a meter before installing the lights fully. Do not rely only on the light turning on. Recheck the ground after the first ride, because vibration can loosen connections.
Why Wire Golf Cart Lights to a Voltage Reducer?
A golf cart battery pack can supply more voltage than standard lights require. A voltage reducer creates a safer 12-volt circuit for compatible lighting. It also helps prevent overheating, flickering, and premature LED failure. However, installation should begin with testing, not guesswork.
Use a calibrated multimeter to measure the reducer’s 12-volt output. Test it without a load, then test again while the lights operate. Check polarity carefully before connecting the LED terminals. Positive and negative leads must match the light’s requirements. Reverse polarity can damage some components. Measure voltage at the reducer and at the light. A noticeable difference indicates voltage drop from long wires, weak connections, or undersized cable. Measure LED current as well. The reading should remain below the reducer’s rated capacity. In practical service work, small connection faults often cause larger problems than expected. I have seen stable voltage become unreliable after vibration loosened one terminal.
Tips: Use short, protected wiring where possible. Inspect crimped terminals by gently pulling them. Test every circuit under real load. If the voltage drops sharply, stop and inspect the wiring before continuing. A second check is worthwhile.
A voltage reducer protects 12 V LED lights from a higher battery-pack voltage. The chart shows representative test readings as load increases: regulated output voltage remains near 12 V while LED current rises with the connected load.
Before installation, confirm a stable 12 V output with a multimeter, verify positive and negative polarity, measure voltage drop under load, and check that LED current stays below the reducer's rated capacity. A loaded output of approximately 11.8–12.2 V is generally suitable for nominal 12 V lighting.
The voltage is too high. It can overheat wires, damage bulbs, or shorten LED life. Direct wiring is unsafe.
It converts higher battery voltage into a stable 12-volt supply. Lights stay more consistent as battery voltage changes.
Use a multimeter across the battery pack terminals. Check the reading before connecting any wires.
Choose a reducer rated above the battery’s maximum charging voltage. A 48-volt system may rise above 48 volts while charging.
Add the wattage of every light and accessory. Divide total watts by 12 volts. For example, 60 watts needs about 5 amps.
Keep roughly 25 to 30 percent reserve capacity. A small margin helps when several lights run together. Heat is easy to underestimate.
Place a correctly sized fuse close to the power source. It helps protect the input wiring during a fault.
Match positive and negative terminals exactly. Keep connections tight and protected from sharp metal edges. Leave space for inspection.
Measure output voltage with the lights switched on. A no-load reading may look correct, but real readings can differ.
No, but reliable routing matters more than appearance. Crowded compartments are imperfect. Provide ventilation and avoid trapped heat.
Wiring golf cart lights to a voltage reducer is essential when using 12 V lighting on a 36 V or 48 V battery system. The reducer safely lowers the battery voltage and helps protect lights from overheating or premature failure. Before installation, identify the voltage difference and calculate the lighting load using P = V × I. This calculation helps determine the reducer’s required capacity and ensures it can handle the total wattage.
When learning How to wire golf cart lights to a voltage reducer, choose a reducer rated above both the battery voltage and the combined lighting load. Install an appropriately sized fuse close to the battery, connect the 12 V circuits with correct polarity, and establish a secure ground. After wiring, test the reducer’s output voltage, check for voltage drop under load, and measure LED current before regular use. These steps improve safety, reliability, and lighting performance.

Tulip Cart